I'm back again for another one of Laurie's Fabulous Favorites challenges.
The challenge this time was to make the sentiment into the main focal point of the card. I currently need several thank you cards, so I pulled out this Thank You Heart die from Simon Says Stamps.
This first card, and the one I am entering into the challenge, was made with Papertrey Ink Berry Sorbet patterned papers. I diecut the sentiment from PTI White Tag Stock twice and glued them together for dimension. Then I glued them onto a piece of the Berry Sorbet striped paper and trimmed around the edges of the diecut before adhering it to my card front.
The sentiment is from the PTI Thanks All Ways stamp set. I added a cute little diecut heart cut from Berry Sorbet cardstock and covered it with glossy accents just to add a little bling and interest to my sentiment strip.
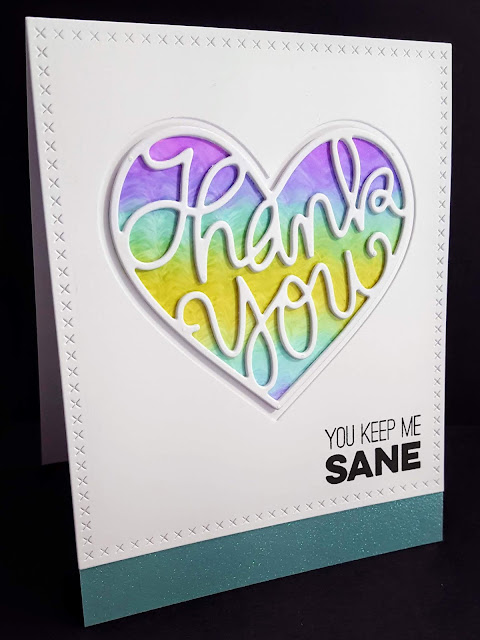
I have been wanting to try some new techniques for making backgrounds as well, so I decided this was a great time to get fancy with my Distress Inks and Alcohol Inks. This next card just might be my favorite from this post. I created a background with Alcohol Inks and Pearl Mixative on Yupo paper to back my diecut. I totally LOVE how the background turned out!
That cute, stitched panel is from Mama Elephant's Sew Fancy die set. The die is actually A2 size, but I re-positioned my paper and cut it again to make it a smaller panel. I also used the solid heart die from SSS to cut a window out of the center. Doing so created a cute frame around my diecut.
The pretty glitter paper is from an old DCWV pad of glitter papers, and the stamped sentiment is from the MFT Friends Like Us stamp set.
Next, I have a pair of coordinating cards. I created a panel using emboss resist and Distress Inks, then I diecut the heart from my panel. I used the diecut on one card and the negative panel on the other. The background stamp is called Flower Dot background from Hero Arts.
I kept all of the inside pieces of the diecut image and pieced them back into position inside of a white diecut. I also stacked two of the hearts so that the diecut outline stands out from the panel. I decided not to add any other decorations and just let the background do the talking.
I used the negative pieces of one of my white diecuts to fill in the empty spaces of the heart that I cut from my inked panel and mounted the whole thing on a piece of vellum that was cut with the solid heart die. I created another background for this card by stamping the MFT Arrow Ends Background Builder stamp onto MFT Grout Gray cardstock using Simon Says Stamp Fog ink. I used my MISTI to stamp it three times because the ink is so light.
Since the background is so plain, I added some Doodlebug Design Sprinkles for extra personality.
The final pair of cards are also coordinating cards. Both were made with similar backgrounds that I created with Alcohol Inks on glossy cardstock. I stamped them both with the Hero Arts Leaf & Floral background stamp and heat embossed them.
This first one was embossed with white powder. I mounted my diecut heart onto Hawaiian Shores cardstock and backed it with craft foam so that it wouldn't be lost in the background.
On the second card, I used WOW! Silver Pearl powder, which looks amazing in person. The background colors show through it slightly, but it also has a pretty, pearlescent shine.
I didn't want to hide too much of the background with solid cardstock, so I mounted my diecut onto vellum. I also added a small diecut heart that I sparkled up with Wink of Stella and glossy accents.
Wow! This may be the longest post I've ever written! I was just having so much fun playing with different backgrounds that I couldn't stop creating.
TTFN!


