10.26.2014

Owl-oween Greetings!

Hi!  I'm so far behind with posts it's ridiculous, but I thought I'd pop in to share a quick card today.

Fall is my favorite time of year.  I love the cool, crisp air in the mornings and the warm, breezy afternoons.  I get so excited each year when the leaves begin to change, and every time I see a tree swathed in red, orange, or yellow leaves I can't help but smile.  There's no scenery more beautiful to me than the sun streaming through the fall leaves.  Here's a photo I took this morning of the view outside my back door.


Unfortunately, I don't get a big variety of colors in my backyard view.  My trees all seem to turn yellow, but it's still a gorgeous view.

I am fortunate though to live in the Illinois River Valley.  The trees all along the river paint a beautiful picture when the leaves turn.  I took this picture last fall on a local road called Grand View Drive.  I think you can see how the road got it's name!  :)  There are multiple overlook spots along the roadside, with benches and picnic tables to sit and enjoy the view along the river.  Isn't it breathtaking?


I also love how much character you can find in a single leaf.  No two are the same.

And of course, one of the best parts about fall is Halloween.  I love this holiday!  I work in a school that still allows the annual costume parade for the little kids and, my favorite part, the costume contest for the big kids.  It's blast every year!

In honor of the upcoming holiday, I created this card to send to my brother's kids.


The adorable images come from a stamp set I got years ago from The Craft's Meow (sadly, no longer in business).  This set is called Happy H'owl'oween.  These little owls are all dressed up for trick-or-treating.  And here is the inside of the card.


One last photo and then I'm off to catch up my housework [Yuck!].  Happy Halloween!


8.03.2014

Make It Monday #174: Diamond Wallpaper Pt 2

Just another quick entry into the Make It Monday challenge #174: Diamond Wallpaper challenge.


Stamps: PTI - A Big Thankyou, A Little Argyle, Damask Designs
Paper:  PTI - Tropical Teal, True Black
Dies:  Spellbinders - Majestic Labels Eight & Simon Says Stamp - Devonshire & Paulina Butterflies
Ink:  Hero Arts Black Dye Ink
Other:  Swarovski heat set crystals & Stampin' Up dimensionals

Make It Monday #174 - Ahoy Little Sailor

Today I'm playing along with Papertrey Ink's Make It Monday challenge #174.  The theme is Wallpaper Stamping, and this one was definitely a great challenge!  It gave me the perfect reason to pull out A Little Argyle, and I also had the perfect occasion for using this set on a card.  One of my co-workers and his wife had a baby boy a couple of weeks ago, and I'm way overdue for making a congratulatory card for them.


I've known all along that my card would have a nautical theme, because this little guys Daddy was totally excited about the nautical baby nursery they've been working on for him.  So of course, I had to pull out my Bitty Baby Blessing stamp set; it has the perfect little sail boat and sentiment for this occasion!  Ahoy, Little Sailor!  I just love that sentiment!!  :)  Too cute!

So I started off with some Pure Poppy cardstock and stamped the large, dashed X from A Little Argyle to create the diamond grid with Memories Unicorn pigment ink.  After that dried, I added the stars using the smallest star stamp in the Banner Builder set and VersaMark ink.  I added some white embossing powder from PTI and heat set it to help the background POP a little bit.


In this picture of the sailor knot I made, you can sort of see how the stars have a little shine to them from the embossing powder.  I learned how to tie a sailor knot from this great tutorial by Barbara Anders.  I had no idea a sailor knot was so easy to tie!  And they add so much personality to a card!


I re-purposed the mason jar from Lawn Fawn's Summertime Charm set to be my "bottle".  I die cut and stamped the jar on white cardstock, and then stamped just the lid again on white cardstock.  Then I stamped the bottom part of the jar onto some Spring Rain cardstock twice, which I then die cut using a Spellbinders edger die of a large scalloped edge.  I fussy cut the bottom part of my "waves" along the outline of the jar so it appears that my water is contained inside the bottle.  I colored and fussy cut the lid and glued it over the top of the base image.  Then the little sail boat was colored and popped up on a dimensional dot from Stampin' Up.


I die cut a little flag with a Lil' Inker Designs die and stamped it with my sentiment in black ink.  I stamped over it again with VersaMark and added clear embossing powder, which you can see adds a little bit more shine to this card.  I love to have some shine on cards, but I wanted to keep it subtle since this is for a boy.  And don't you just LOVE those stitch lines in the die cut flag?  I adore Lil' Inkers stitched dies!


My wallpaper background was adhered down to a Spring Rain mat, and those were glued down to my white card base.  I cut my sentiment flag to be flush with the edge of the card, and viola!  A beautiful wallpaper background and an adorable card for a new baby boy!  I can't wait till the little guy is old enough to come visit us at the school; I totally need me a baby fix!  :)  A shipshape card if I do say so myself......and I do!  LOL

7.31.2014

More Gerberas! part 3

I made a few more cards to submit to the Uniko Studio Anything Goes Challenge #12.


I had some free time tonight and managed to create three new cards!  That's a record for me!  But this stamp set from Uniko Studio is so much fun to play with that I was bubbling with ideas tonight.  :)


This first one is super simple.  I just stamped the outline image in red ink and the sentiment in matching ink.  I added a strip of navy blue patterned paper and that's it!  Simple and yet very elegant.


For this second card, I stamped the same image in three different colors.  Then I masked off all but one edge of the card so I could stamp the chevron background on the edge.  I inked up the background stamp in sections with the inks that match the flowers and then stamped it onto the exposed area of my card.  I added a strip of seam binding ribbon so finish it off.  Simple!


But this last card is my favorite!  I layered the smaller piece of white paper on top of the card base and stamped the flower with VersaMark.  I heat embossed it with pink Zing powder.  Then I matted the smaller section on black and adhered it directly to my card base.  I also added the ribbon and tag.  Simple...again....but Super Cute!


This stamp set is so versatile and I love it sooo much!  I'm sure I'll be playing with it again very soon!  :)

More Gerberas! part 2

I made a few more cards to submit to the Uniko Studio Anything Goes Challenge #12.


I had some free time tonight and managed to create three new cards!  That's a record for me!  But this stamp set from Uniko Studio is so much fun to play with that I was bubbling with ideas tonight.  :)


This first one is super simple.  I just stamped the outline image in red ink and the sentiment in matching ink.  I added a strip of navy blue patterned paper and that's it!  Simple and yet very elegant.


For this second card, I stamped the same image in three different colors.  Then I masked off all but one edge of the card so I could stamp the chevron background on the edge.  I inked up the background stamp in sections with the inks that match the flowers and then stamped it onto the exposed area of my card.  I added a strip of seam binding ribbon so finish it off.  Simple!


But this last card is my favorite!  I layered the smaller piece of white paper on top of the card base and stamped the flower with VersaMark.  I heat embossed it with pink Zing powder.  Then I matted the smaller section on black and adhered it directly to my card base.  I also added the ribbon and tag.  Simple...again....but Super Cute!


This stamp set is so versatile and I love it sooo much!  I'm sure I'll be playing with it again very soon!  :)

More Gerberas!

I made a few more cards to submit to the Uniko Studio Anything Goes Challenge #12.


I had some free time tonight and managed to create three new cards!  That's a record for me!  But this stamp set from Uniko Studio is so much fun to play with that I was bubbling with ideas tonight.  :)


This first one is super simple.  I just stamped the outline image in red ink and the sentiment in matching ink.  I added a strip of navy blue patterned paper and that's it!  Simple and yet very elegant.


For this second card, I stamped the same image in three different colors.  Then I masked off all but one edge of the card so I could stamp the chevron background on the edge.  I inked up the background stamp in sections with the inks that match the flowers and then stamped it onto the exposed area of my card.  I added a strip of seam binding ribbon so finish it off.  Simple!


But this last card is my favorite!  I layered the smaller piece of white paper on top of the card base and stamped the flower with VersaMark.  I heat embossed it with pink Zing powder.  Then I matted the smaller section on black and adhered it directly to my card base.  I also added the ribbon and tag.  Simple...again....but Super Cute!


This stamp set is so versatile and I love it sooo much!  I'm sure I'll be playing with it again very soon!  :)

7.21.2014

USC 12 - Anything Goes!

Today I'm playing along with the Uniko Studio Challenge #12 and anything goes! 

View USC Blog HERE

I recently received my first Uniko Studio stamp set, Pure Florals Gerbera, and I've been dying to play with this set!  One of my co-workers has a birthday next week so I figured it was the perfect opportunity to have some fun with this stamp set.


All of the panel layers were die cut using the Spellbinders Radiant Rectangles set.  This is such an incredible set of dies!  I love all the tiny details that get embossed into the panels and those itty-bitty pierced holes around the edges!  The panel papers are cut from Papertrey Ink cardstocks; Hibiscus Burst, True Black, and Stampers Select White. 


This sentiment comes from the Papertrey Ink Movers and Shakers Sentiments set.  I thought that if I just stamped it in black or pink it might get lost amid all those fancy flourishes in the card panels, so I decided to stamp it once with VersaMark and emboss with black powder, and then I stamped it again with Hibiscus Burst ink slightly offset to add a shadow.  Now the sentiment pops out right along with the flower!


But the crown jewel of this card is the gorgeous gerbera daisy from Uniko Studio!  Gerbera daisies are my favorite flower, so I fell in love with this stamp set the second I saw it.  I love how big these flowers are because it allows for plenty of room to blend my colors in the petals.  I colored it with Copic markers on X-press It Blending paper and fussy cut out the flower and leaves.  They are popped up with foam dots in two different thicknesses for dimension. 


I took inspiration from this card I spotted on Pinterest [originally pinned from Zazzle].  I really liked the color scheme with that frame of black flourishes on on a white background, which I incorporated into my card.
Overall, I'm thrilled with how this card turned out!  I can't wait to play with these gerbera stamps again soon!

5.25.2014

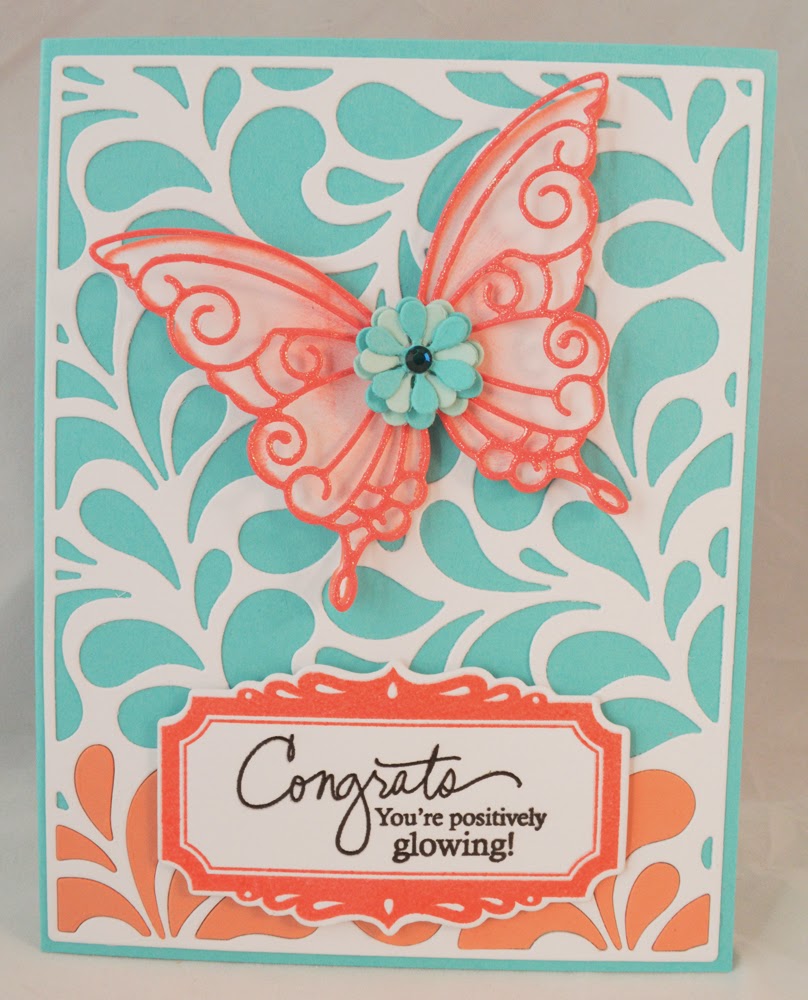
You're Positively Glowing!

I'm playing along tonight with the May Blog Hop Challenge for Papertrey Ink.

May Blog Hop Challenge
A friend of mine recently announced that she's pregnant with her first baby!  So of course, I couldn't wait to make her a congratulatory card.  


I die cut the detailed butterfly from Berry Sorbet cardstock and the background butterfly from Stamper's Select White.  I very lightly added some ink to the background butterfly for contrast with a sponge applicator.  My flower pieces were die cut from Hawaiian Shores and Aqua Mist cardstocks, and I added a little bling to the center.  I colored over the entire detailed butterfly with Wink of Stella to sparkle it up, and I love the subtle touch it adds.  :)


The sentiment frame comes from the Pretty Peonies stamp set and the sentiment is from Signature Greetings II set.  I stamped the frame with Berry Sorbet ink and then I added clear embossing powder over both frame and sentiment to make it pop and shine.


The card base is Hawaiian Shores and topped with that great background die.  I felt like the card still needed a little something, so I filled in some of the die cut background pieces with Mellon Berry cardstock, which I think added some nice contrast to the sentiment panel.  I also popped up the butterfly and sentiment panel with pop dots so they wouldn't be swallowed up in the background.  There is so much dimension to this card! 

My card was inspired be this card from Lorraine's Loft.  That's all for tonight.  Thanks for visiting!  And have a safe and happy Memorial Day!  :) 

Products by PTI unless otherwise noted below.
Papers:  Stamper's Select White, Hawaiian Shores, Aqua Mist, Berry Sorbet, Melon Berry
Dies:  Pretty Peonies, Paulina & Devonshire Butterfly (Simon Says Stamp), Cover Up Die Swirls (Lil' Inker Designs), Asterisks (Cuttlebug)
Stamps:  Pretty Peonies, Signature Greetings II
Ink:  Berry Sorbet, VersaFine black (Tsukineko)
Other:  Swarovski Rinestone, Wink of Stella Clear Brush

5.24.2014

My Baby's Growing Up Too Fast!

It seems like just last week that I dropped him off for his first day of kindergarten, but next week he'll be graduating from 8th grade!  I can't believe how fast time flies!

I made this fun shaker card to give to him at his graduation party....


The card panel and stars are glued onto a piece of clear acetate, and then the whole panel is popped up with dimensional adhesive on the card base.


I filled the shaker area with confetti shaped like little graduation caps.  So fun!  :)


And here is the inside of the card.  I am truly blessed to have such a wonderful young man; even if he is growing up too fast for my liking.  Love you, Kiddo!  <3

A Dino-mite Birthday!

Here's a card I made my hubby for his birthday this week....


I love this Lawn Fawn stamp set!  The dinos are so cute!


My hubby is crazy about dinosaurs.  He especially loves the dino exhibits in museums.  We always have to skip straight to the dinos and then backtrack to see the other exhibits.  :)


I added this cute baby dino on the inside of the card.  Isn't he adorable?  :)

A Little Sunshine

The sun is shining today after several days of rain and gloom, so I thought I'd make a sunny card.  :)  This is going to my sister-in-law when she has surgery in a couple of weeks.


I totally scrap lifted this one from Jennifer Rzasa.  I loved her card so much that I just had to recreate it.  :)  The colors are just so bright and cheerful together!  And I love how the sentiment on vellum allows all that sunshine and joy to shine right through the sentiment panel.  :)

The stamps are from the Papertrey Ink Hello Sunshine set.  The ink colors are Tide Pool and Butter Bar from Hero Arts Shadow Ink.

That circle and the clouds are Lil' Inker dies.  I love their signature stitched outlines on their dies!  It just adds a little pizzazz to everything.  :)


I wanted to sentiment to really stand out, so I heat embossed it with black powder....it has a shine of it's own.

That's all for today!  Enjoy the sunshine!

For My Hubby

My hubby and I celebrated our 7th anniversary on Monday!  Here's the card I made him for the occasion.


The outer piece of each heart is glued directly to the card panel, and the centers of each heart are popped up with dimensionals in two different thicknesses.  Here's a side view....


You can see the dimension best between the darker orange heart and the aqua colored one.

Here's a close up of the hearts so you can see all the details of the stamps used....


Each outer heart is stamped with a texture in VersaMark, and the centers are stamped with a stitch line.  I love that aqua colored button!

This card is almost a duplicate of Nichole's card seen here.  I loved the look of it so much that I wanted to recreate it myself.  :)  Love it!

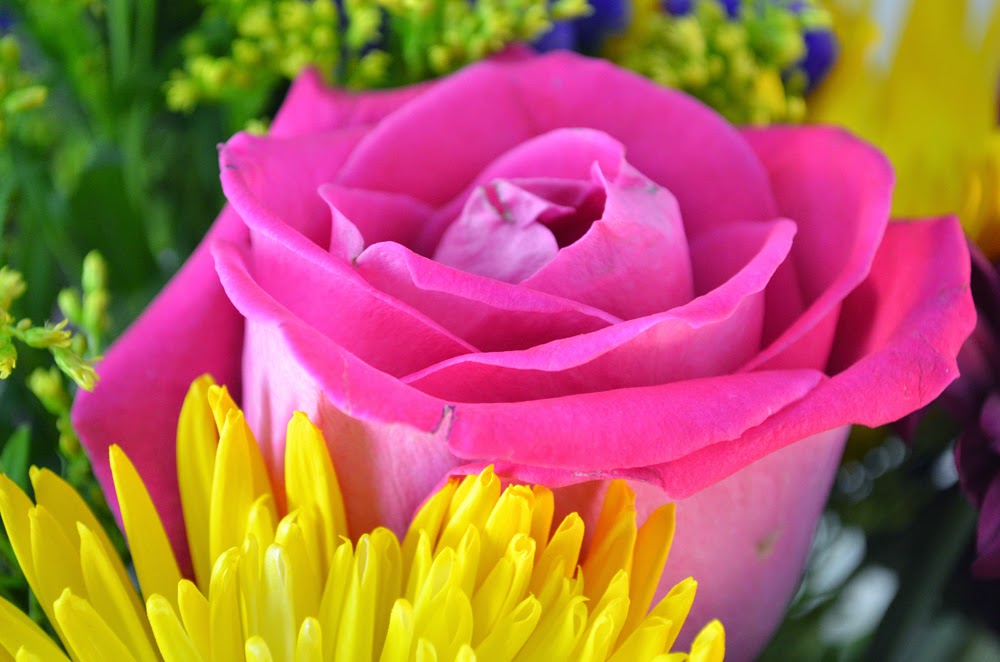
And here's a photo of the gorgeous flower bouquet my sweet hubby bought me...


Aren't they beautiful?  I think so!  I took a few macro shots of some of the blooms...


Thank you, Hubby!  Love you!  <3